
DIY: RV Window Replacement
We caught up with Andrew Phillips and the team from The RV Repair Centre to learn how to reseal a window.
Windows are a significant part of caravanning; they let light and fresh air in. However, if they are not properly maintained, they can also leak water. You can prevent major water damage by monitoring your window seals and replacing them as required.
The process involves completely removing the window from the wall opening, removing the old sealing material, replacing it with new sealing material, and reinstalling the window. Therefore, this guide could also be used if you need to replace an entire window assembly.
Materials and Key Considerations
Depending on the type of wall on your van, you may need to follow different procedures. In this instance, we are looking at a profiled wall where foam strips are recommended. Depending on the surface material, silicone sealant may be preferred for smooth-sided walls.
This process is relatively simple, but you still need to get it right! If you get it a bit wrong, you could end up with a water leak, or if you get it wrong, you could end up with a window falling off, hurtling down the freeway.
You will be working with flammable solvents, so common sense is required. Using the wrong solvents can damage paint and plastics. Using the right silicone is imperative. A neutral-cure silicone will create a seal that can be mechanically broken. Other silicones will create a permanent adhesion that you will never get off. Foam sealant strips come in various widths and thicknesses—your RV repair centre can help you select the correct one for your job.
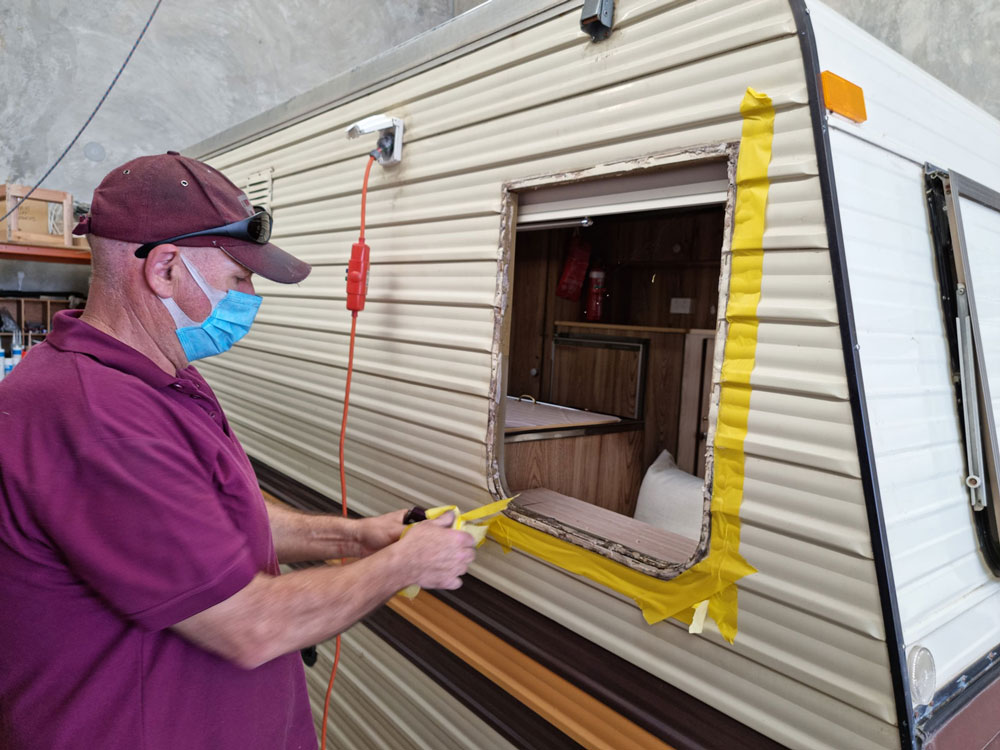
1. Remove Screws and Protect Wall Paint
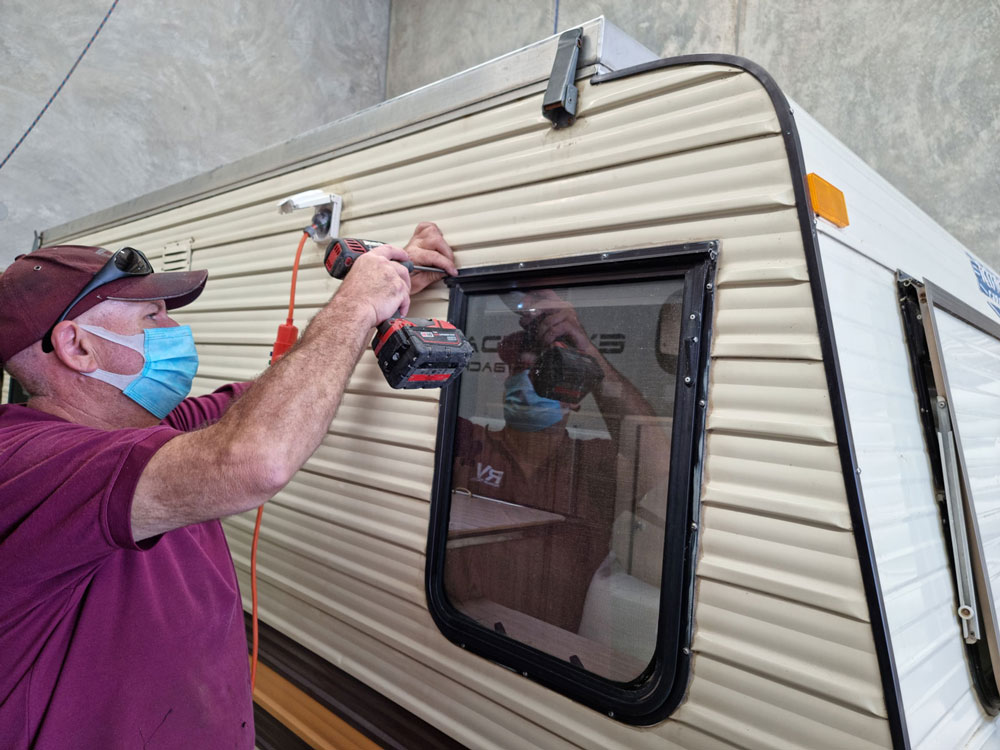
Remove the screws holding the window frame to the wall. They may have been in there a long time, so be very careful not to strip the screw heads. Ensure the screwdriver head fits perfectly — not too big or too small. It might be better to start with an old-fashioned manual screwdriver rather than a power driver so you don’t overdo it. As you remove the last of the screws, be wary that the window may fall off the wall.
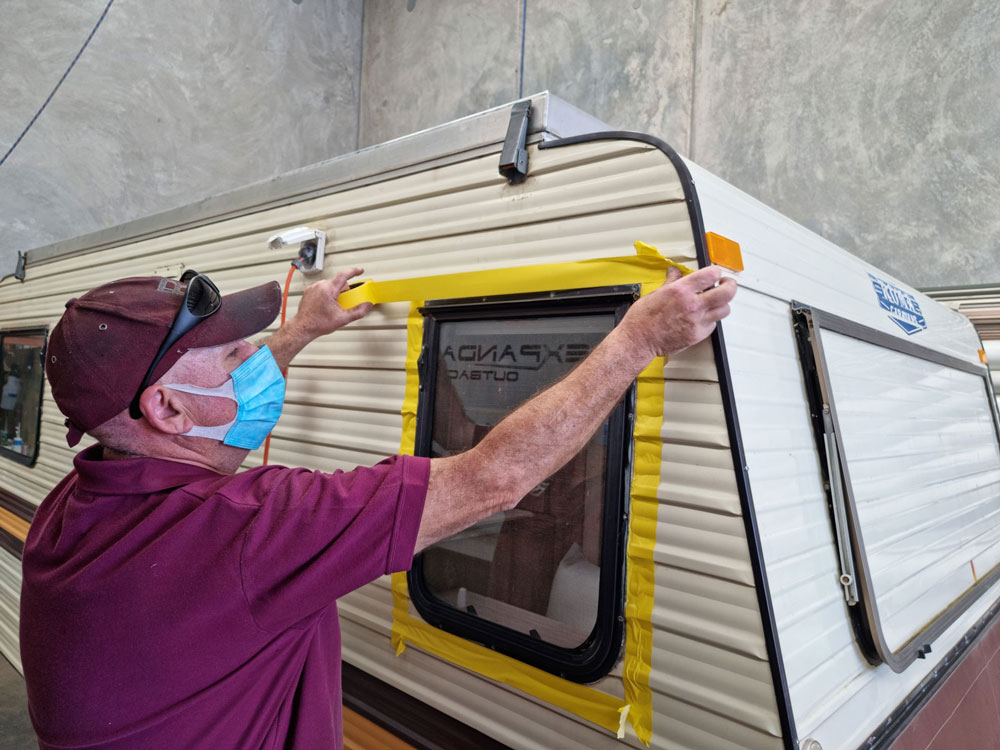
You will likely need to remove the window. To protect the wall paint, apply masking tape around the edge of the window frame.
2. Remove Window
Test to see if the window can be gently levered off with a screwdriver. Do not apply too much force, as you may damage the wall or the window frame. (Many older installations used putty to seal the windows and tend to come off more easily.)
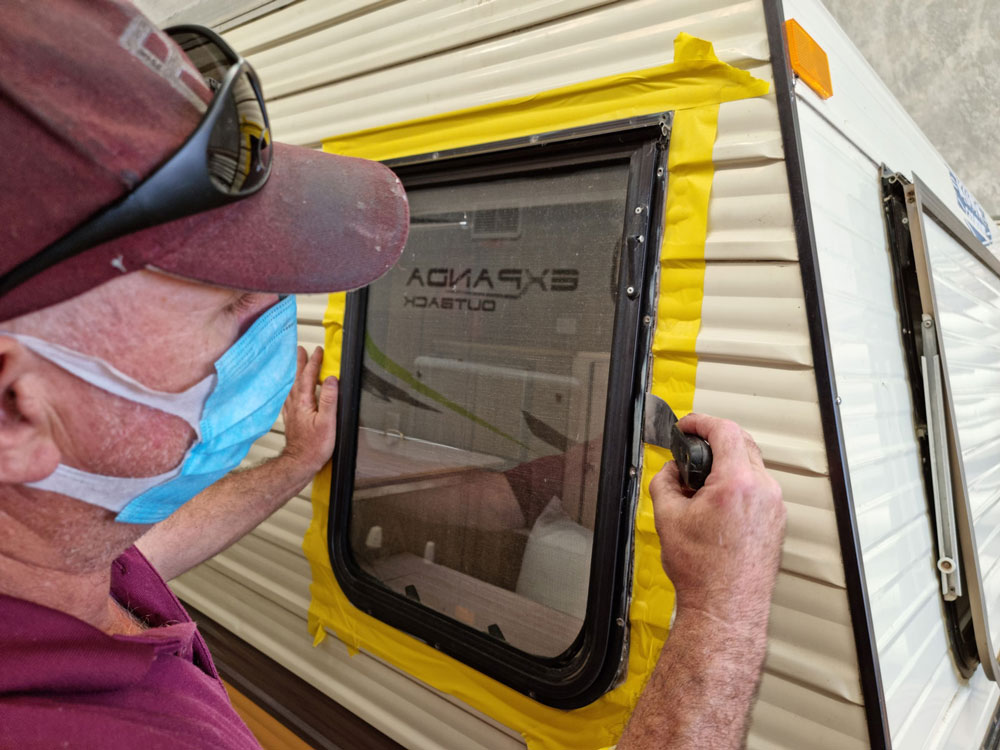
More recent installations used silicone to make a seal, which needs to be broken all the way around with a scraper. If you are having trouble breaking the seal, applying mineral turpentine to the silicone with a rag will help soften it up.
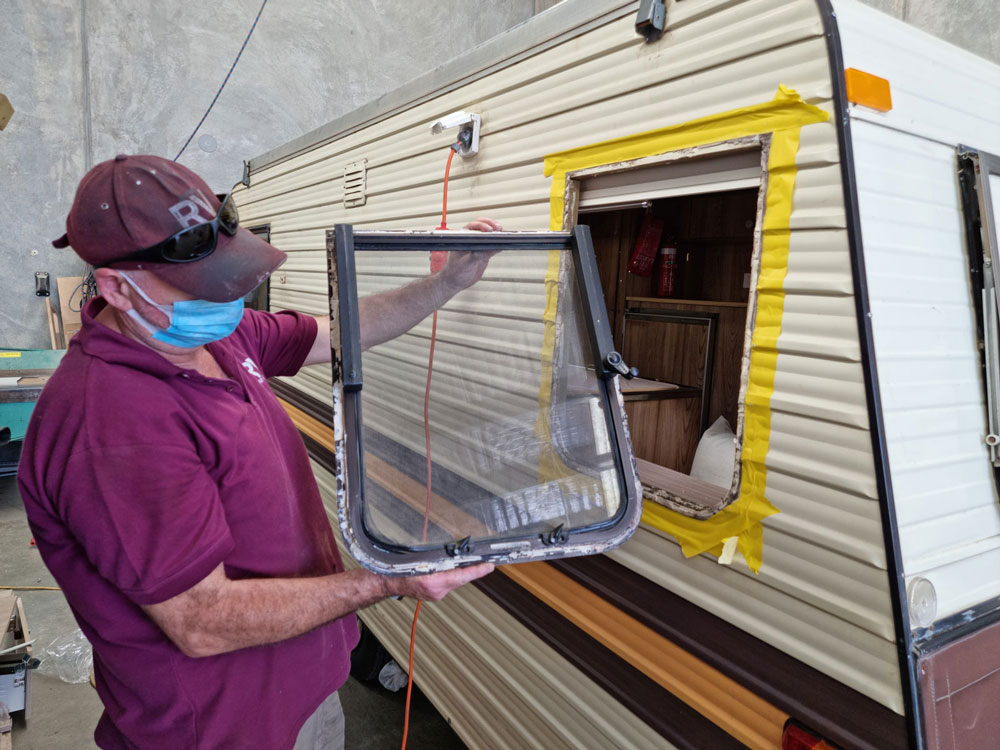
With the screws removed and the seal broken, the window should now come out quickly.
3. Remove Sealant and Masking Tape
Use a plastic scraper to remove the sealant behind the window frame. The guys at The RV Repair Centre use cut-up pieces of old polycarbonate caravan windows as it is a lot tougher than plastic scrapers from the hardware store. Again, mineral turpentine may help to soften the sealant up.
Use the plastic scraper to remove the sealant off the wall, careful not to damage the paint. Again, mineral turpentine can be helpful to soften the adhesive.
4. Clean Wall and Inspect Window Mould/Structure
Check to see if the window plastic moulding is still intact. Handle it carefully, as old plastic ones could be quite brittle. If the plastic moulding needs replacing or you find water damage to the caravan structure or internals, consult your RV repair centre.
5. Scrape Sealant and Clean Window Frame
In this instance, the old-style putty is being removed with a chisel, being careful not to damage the inside of the window frame.
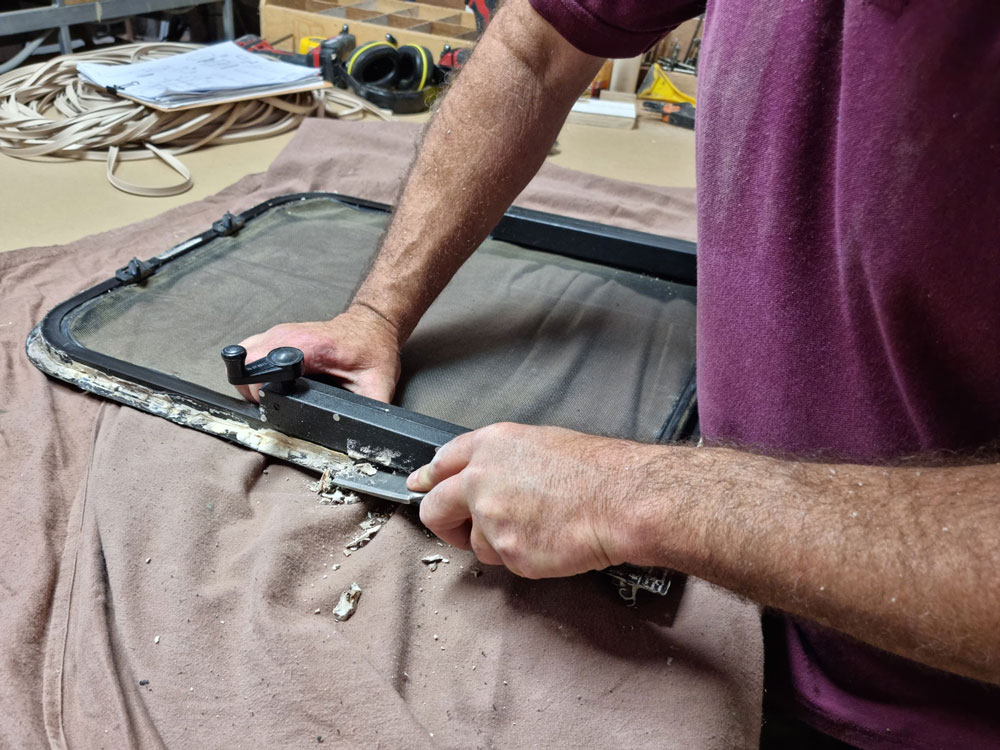
Use the plastic scraper to remove the remaining sealant, including any grooves.
Then, clean the window with mineral turpentine. The surface must be as clean as possible for the new sealant to adhere properly.
6. Remove Turpentine with Methylated Spirits
Mineral turpentine leaves an oily residue that needs to be removed. Use a fresh rag to apply the methylated spirits; otherwise, you will smear more mineral turpentine.
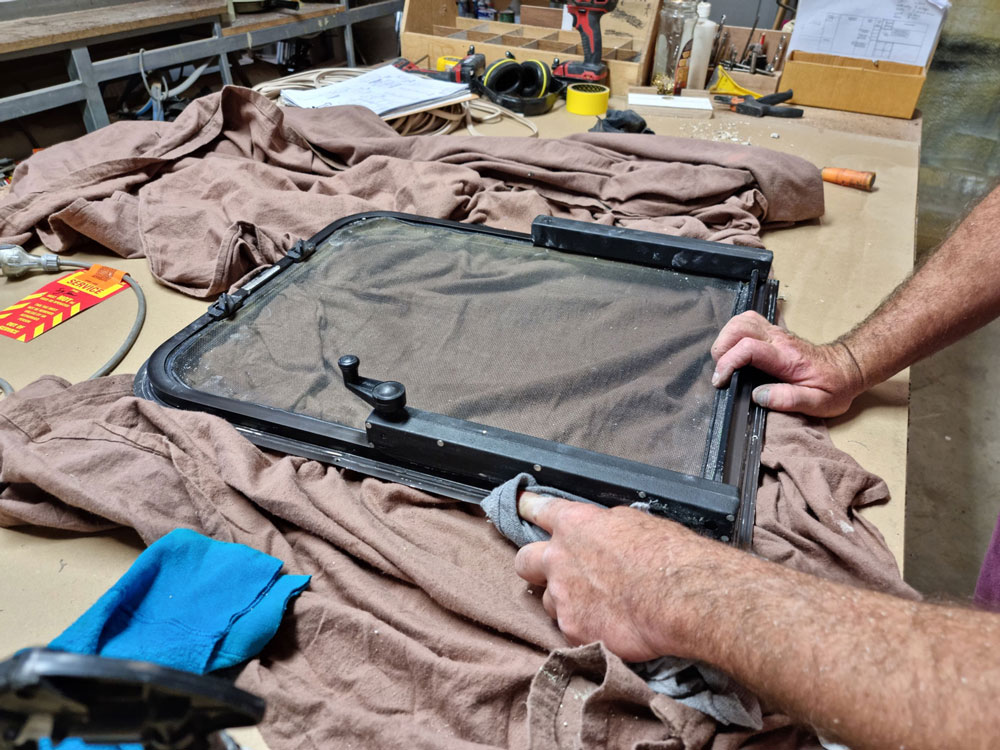
7. Apply Foam Seal to the Top Edge of the Window Frame
Apply the foam seal across the entire width of the top section of the window frame, then remove self-adhesive backing.
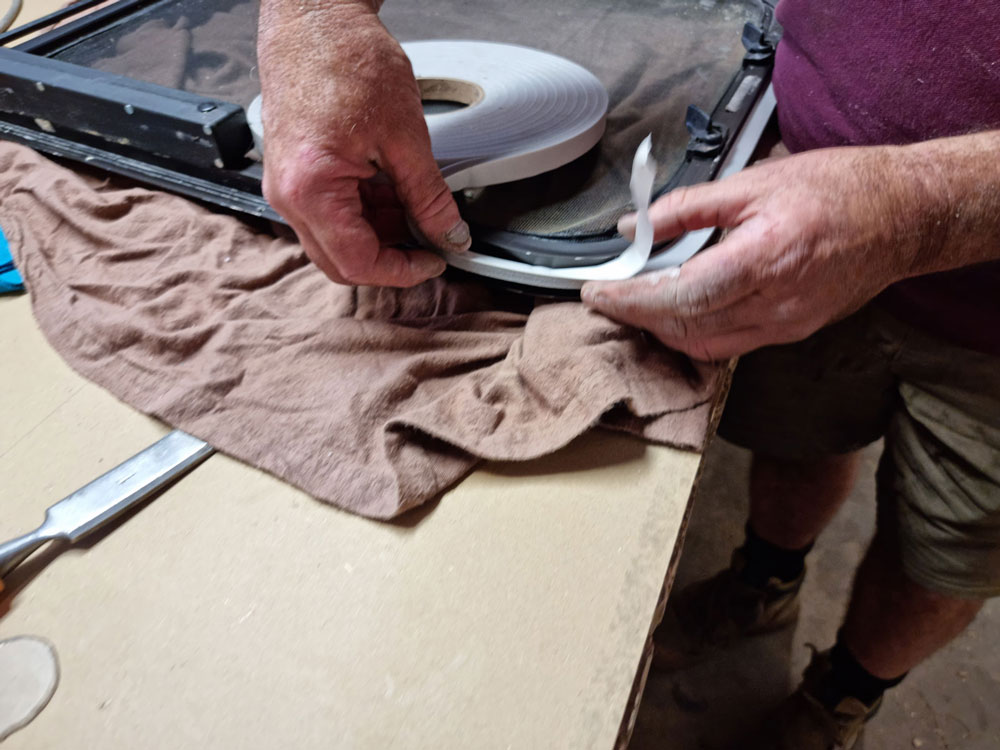
Apply foam seal around the other three sides continuously, eliminating joins. The foam seal can be worked around corners, provided you remove the backing tape as you approach the corners first.
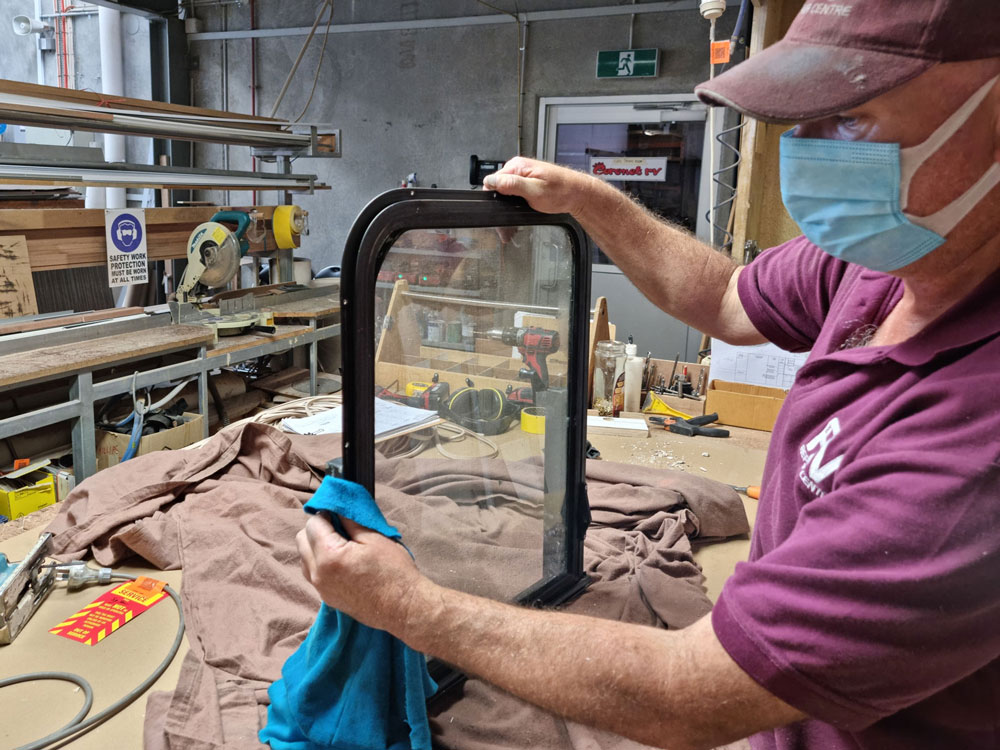
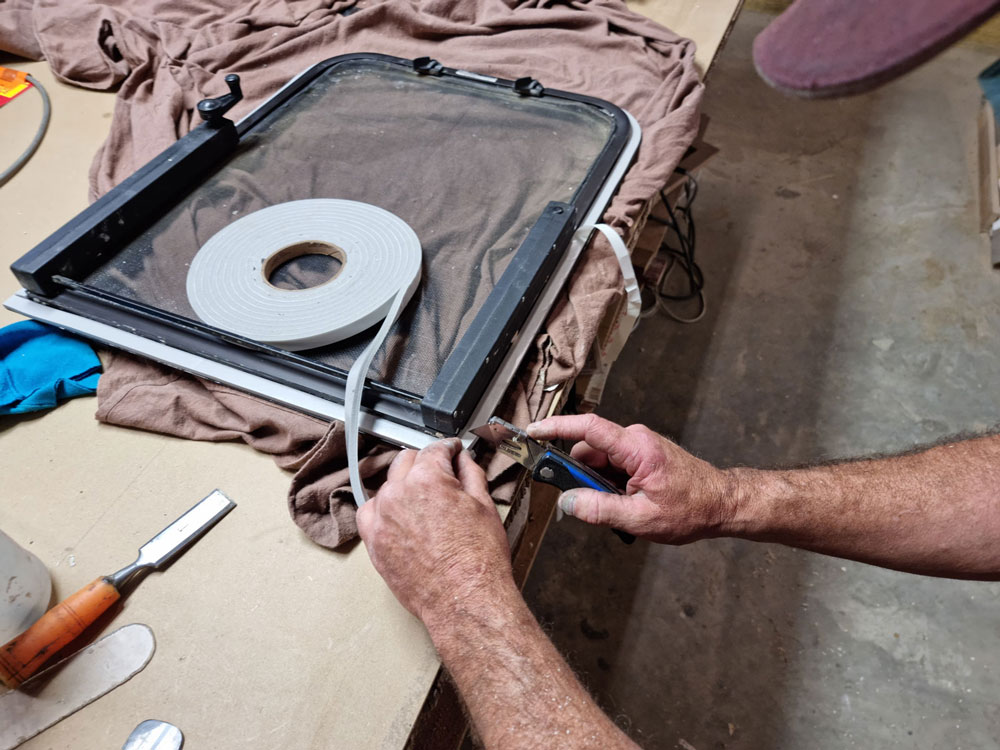
8. Trim Foam Seal
Ensure the foam seal doesn’t leave a gap. Then, with methylated spirits, remove all mineral turpentine residue from the walls.
9. Apply a Narrow Bead of Silicone on the Wall
Apply silicone to the wall only, as putting it on the window will make it messy. Use a general-purpose neutral-cure silicone. Only a fine bead is required, as the silicone just helps the foam seal the tack to the wall. Excess silicone will only ooze out and make a mess you must clean up.
The wall cladding has several horizontal joins. Applying silicone on the edges of the cladding where the joins are will prevent water from seeping in.
10. Carefully Place the Window in the Opening
Before placing the window in the opening, have your screws and screwdriver handy so that you can keep one hand on the window while you get the first screw in. Place the window in such a way that you don’t smear the silicone all over the place.
11. Screw Window Frame to Wall
Use new screws, as your old ones may have damaged heads. Make sure you use stainless steel; other materials may corrode. It is essential not to torque the screws over. Otherwise, you can damage the window frame or wall or over-compress the seal to the point it becomes ineffective.
The RV Repair Centre use a lower torque driver for putting the screws in than the one they use for taking the screws out. Put the first screw in a top corner until the foam just starts to compress. Then place a screw in the other three corners driving to about the same depth. Drive the remaining screws in gently. Go around and torque all the screws a bit further, watching the edge of the window frame to ensure you don’t overtighten to the point of bending the window frame.
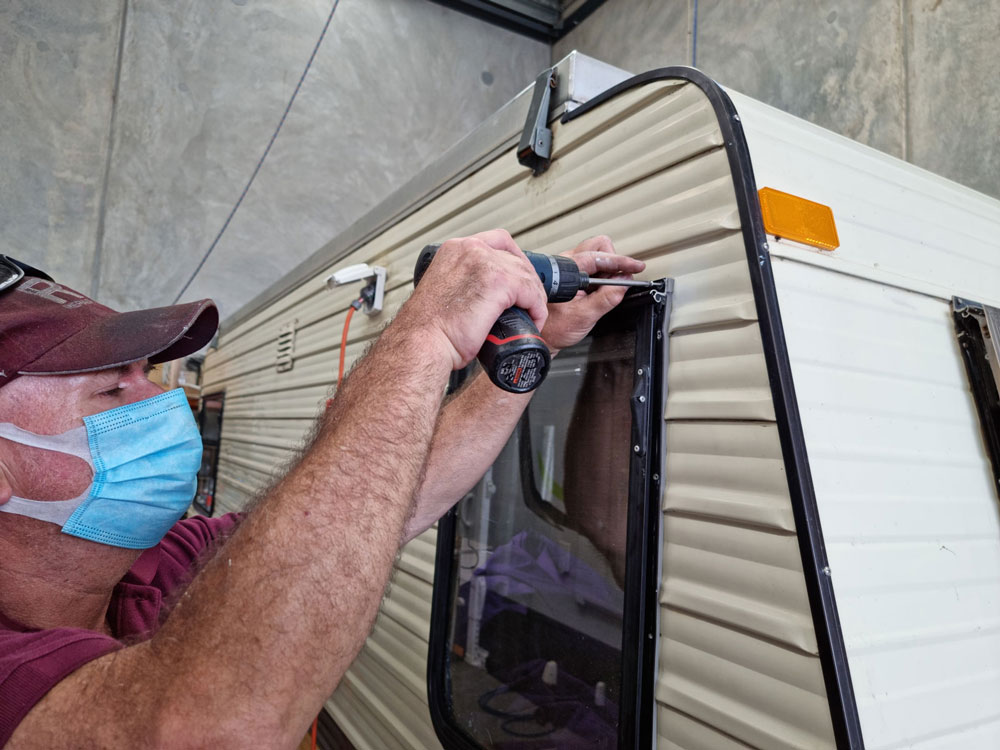
Wipe away any excess silicone that has seeped out.
12. Apply a Fine Bead of Silicone Along the Top of the Window Frame
The top is where water can pool, so a little extra layer of protection will help.
Smooth off the bead.
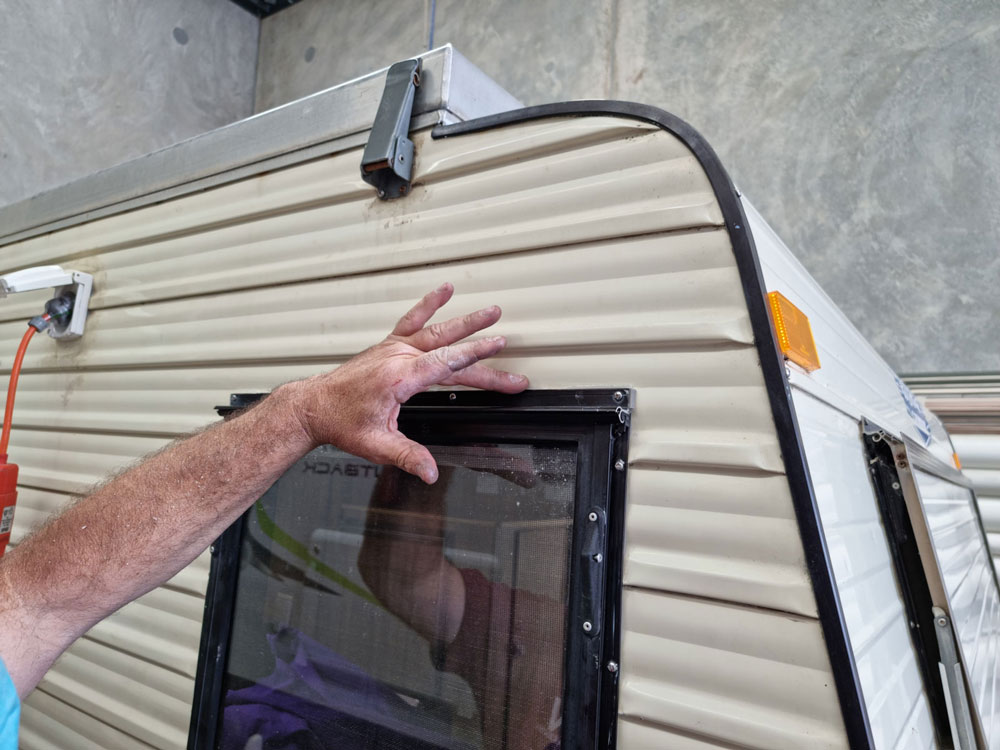
13. Carefully Trim off Any Blging Foam Seal
Be careful not to damage the paint. A very sharp knife will make it easier. Inspect the frame from the inside for any excess silicone, and you’re done.
If In Doubt, Consult a Professional
Improper maintenance can lead to injury, death or property damage. Maintenance work of this nature should only be undertaken by people with suitable competence.
The information provided is general in nature, not comprehensive and should only be taken as a guide. Individual discretion must be exercised, and persons undertaking described tasks do so at their own risk. Publishers and creators of this content accept no responsibility for loss or damage.
Ready for Adventure?
Find your dream van online at OnlyVans.com.au! We have great deals on caravans for sale including used caravans and caravans from private sellers. You can also find motorhomes for sale, camper trailers, and pop top caravans. No matter how you like to travel, we've got you covered.
Article and photos were provided by John Hughes, and previously appeared at TradeRVs.com.au, now powered by OnlyVans.com.au.
Found your perfect purchase? Let’s make financing just as easy!
Work with Australia’s best-reviewed finance broker for a great deal and a stress-free experience. With 2,500+ glowing Google reviews, you can trust you're in good hands! See what our happy customers say in Credit One reviews, or jump right in and crunch the numbers with our handy loan repayment calculator. Your ideal financing solution is just a few clicks away!